note: information on shooting births for photographers at the bottom of this post.
I can’t thank this family enough for letting me be a part of the birth of their new baby MaTeyo <3
I know women are strong, but watching this mama deliver 10lb 10oz MaTeyo underwater on 12-13-14 was one of the highlights of my year, shooting wise! I have wanted to shoot a true water birth for some time now, so this was really wonderful to see…the support of the entire group (midwife, her apprentices, doula, husband and “little doula” two year old Juniper) quietly lifting up Josie as she did some really intense work. It was awesome.
Humans are really amazing creatures, aren’t we?


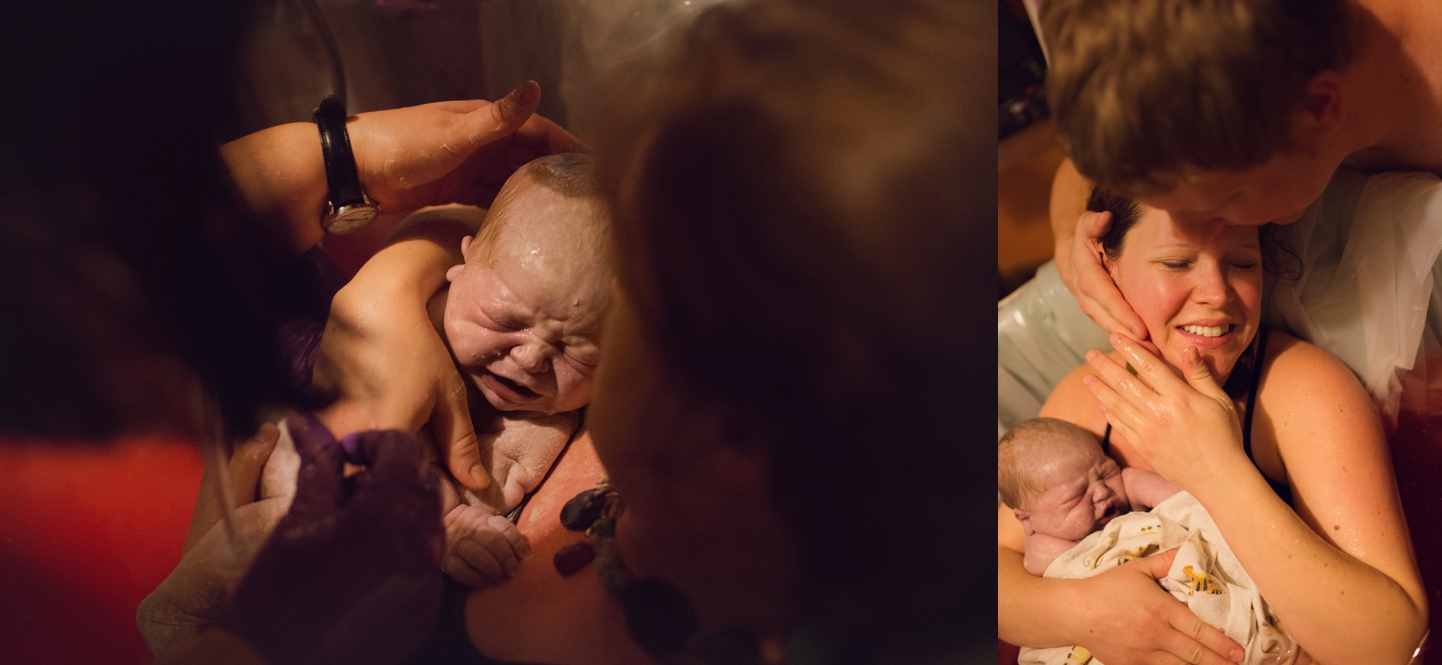


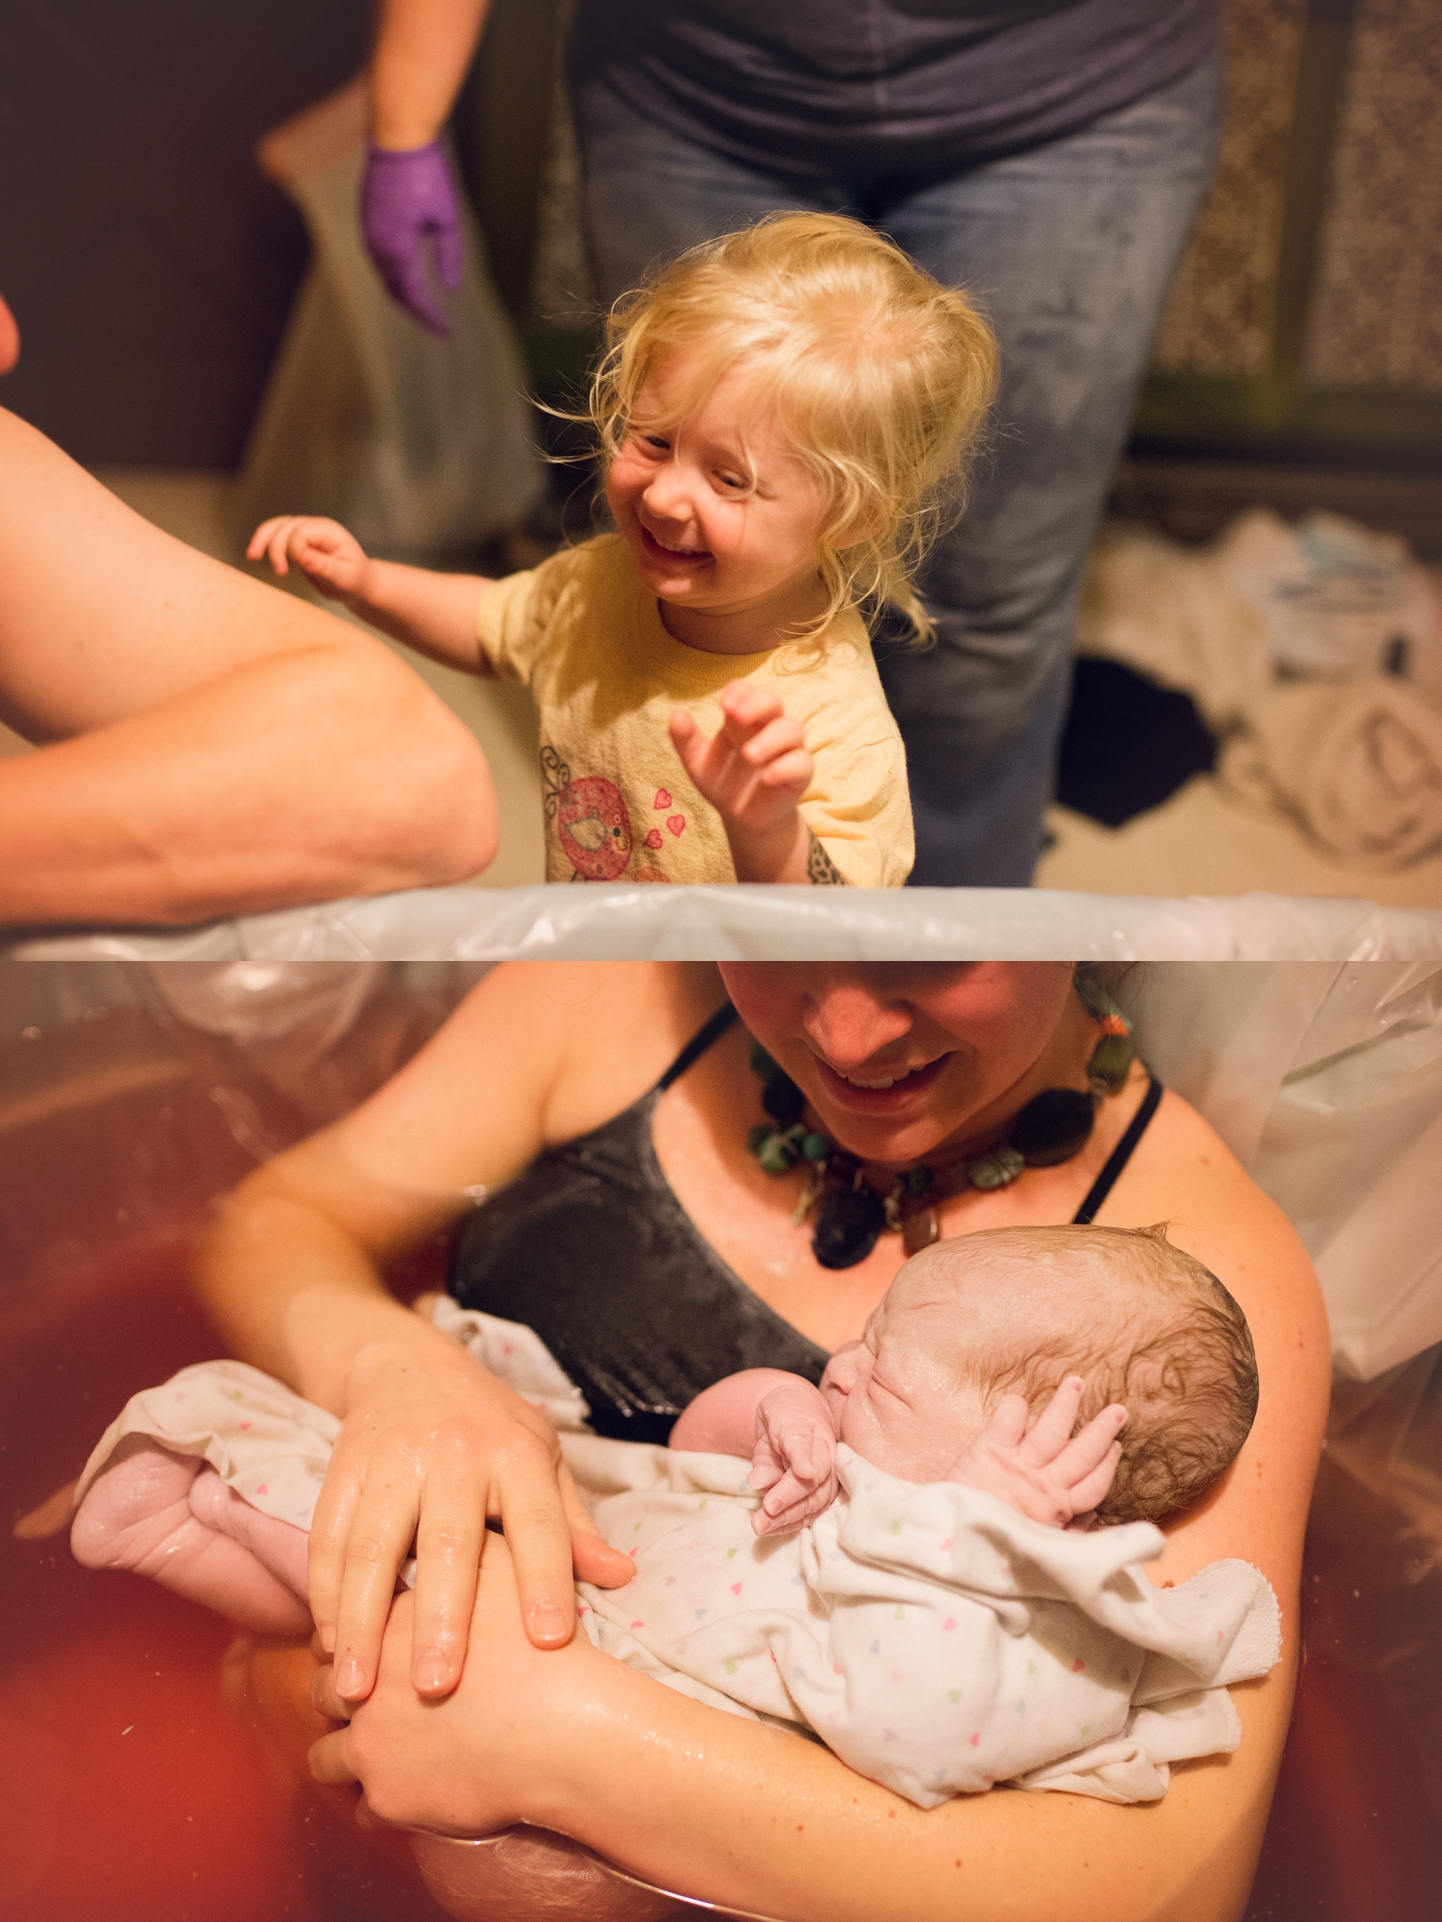


Photogs: I get more questions about births than almost anything else. First, the top 5 questions that come to my inbox:
(stuff on home birth at the bottom!)
1. “How do you price births?
Pricing is totally individual. I can’t tell YOU what YOUR time is worth. However keep this in mind: births can run long. Really long. Being on call for a birth is the same as for a doula or midwife. You have to have a bag packed, camera battery charged, childcare arranged (if you have kids), gas in the car and the ability to pull yourself together all quick-like at 3AM if need be. Do. Not. Undervalue this. Also, you can’t drink a bottle of wine in the evening. Just sayin’.
2. “If I shoot a birth, when do I arrive? When do I leave?”
I usually arrive well before transition. Think 4ish centimeters dilated. I’ve had some close calls :cough cough KARLI: So I’ve learned my lesson. The fact that you’re going to be there a while should not be weighing on you. It should be expected and arranged for. Laboring mothers don’t need to feel all anxious about getting a baby out so the photographer can pick her kid up from daycare.
Typically I leave after all the “big stuff” is done. Storytelling, the actual birth, footprints, weight/measurements, and most of the time, first bath and meeting of older siblings although on a late night birth, those things sometimes have to be skipped, or I come back the following day at an easy time for both of us.
For cesareans: if one is scheduled, about 45 minutes before surgery is actually scheduled.
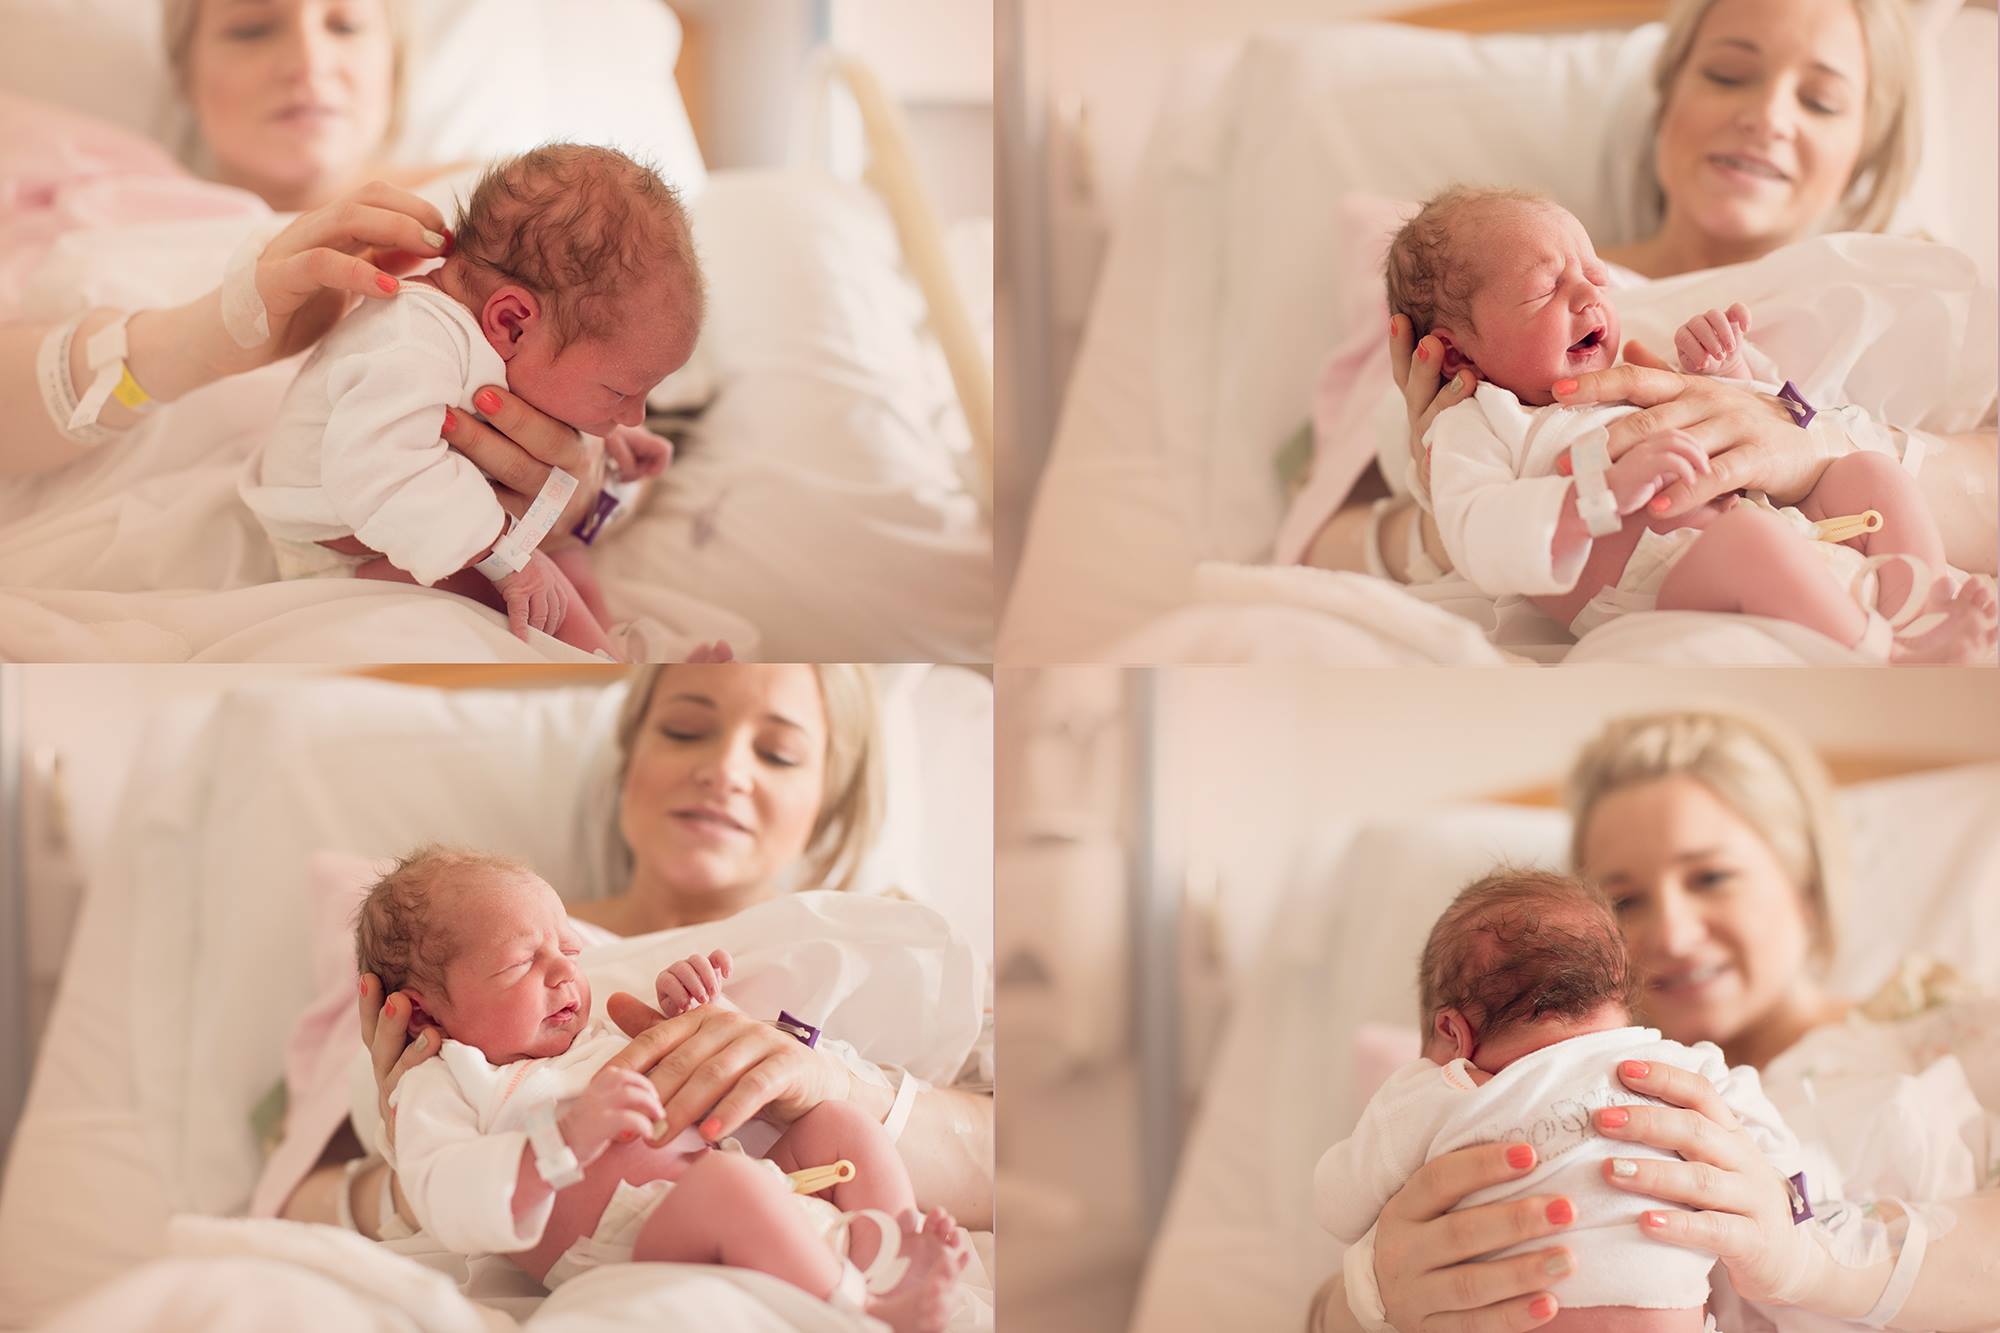
3. “What lens is that???”
Depending on how ambitious I’m feeling, I normally take quite a bit of stuff. Only because when you’re kickin’ it in with a laboring woman for hours on end, why not use that time to get creative and try to step outside the box a little bit? We got nuthin’ but tiiiiime. So…(keep in mind I am shooting full frame on a Canon 1dx which handles extremely high ISOs pretty phenomenally.)
- the workhorse: aka, 35mm 1.4L. If I could only have one, this would be it. Just watch the edges for distortion on fill the frame shots. This lens isn’t friendly to faces up close. Baby heads are funky enough.
- portraits: 50mm 1.2L I put this baby on for fill-the-frame face shots or detail shots of baby. It’s also great for after baby arrives, you can get intimate feeling shots without hovering over the new family.
- Macros: 100mm 2.8L I love detail shots of brand new babies… they can be difficult if the birth is at night, but not impossible. I usually shoot them while baby is being cleaned up by nurse or looked at/unwrapped by adoring visitors
 Move close to a window if possible.
 - fun stuff: 24 mm 3.5 L tilt-shift. I get asked about this one a lot. Not the lens, but particular photos. (like this one) Let me say here, this is NOT a portrait lens. It’s made for architecture. It’s manual focus. It takes a long time to learn. It’s really expensive. You won’t use it very much. I also adore it, although I use it far less than any of my others. I do not by ANY means recommend getting this for births. Just had to throw it out there because I do use it occasionally.
- One thing I never take? Flash. I myself would have punched someone in the throat for flashing me during labor, I’m pretty sure. Yes, some births that take place at night, look like they take place at night, but that is part of their story. A camera that can *really* handle darkness is a must… and no doctors deliver in true pitch black… there’s always that lovely spotlight.
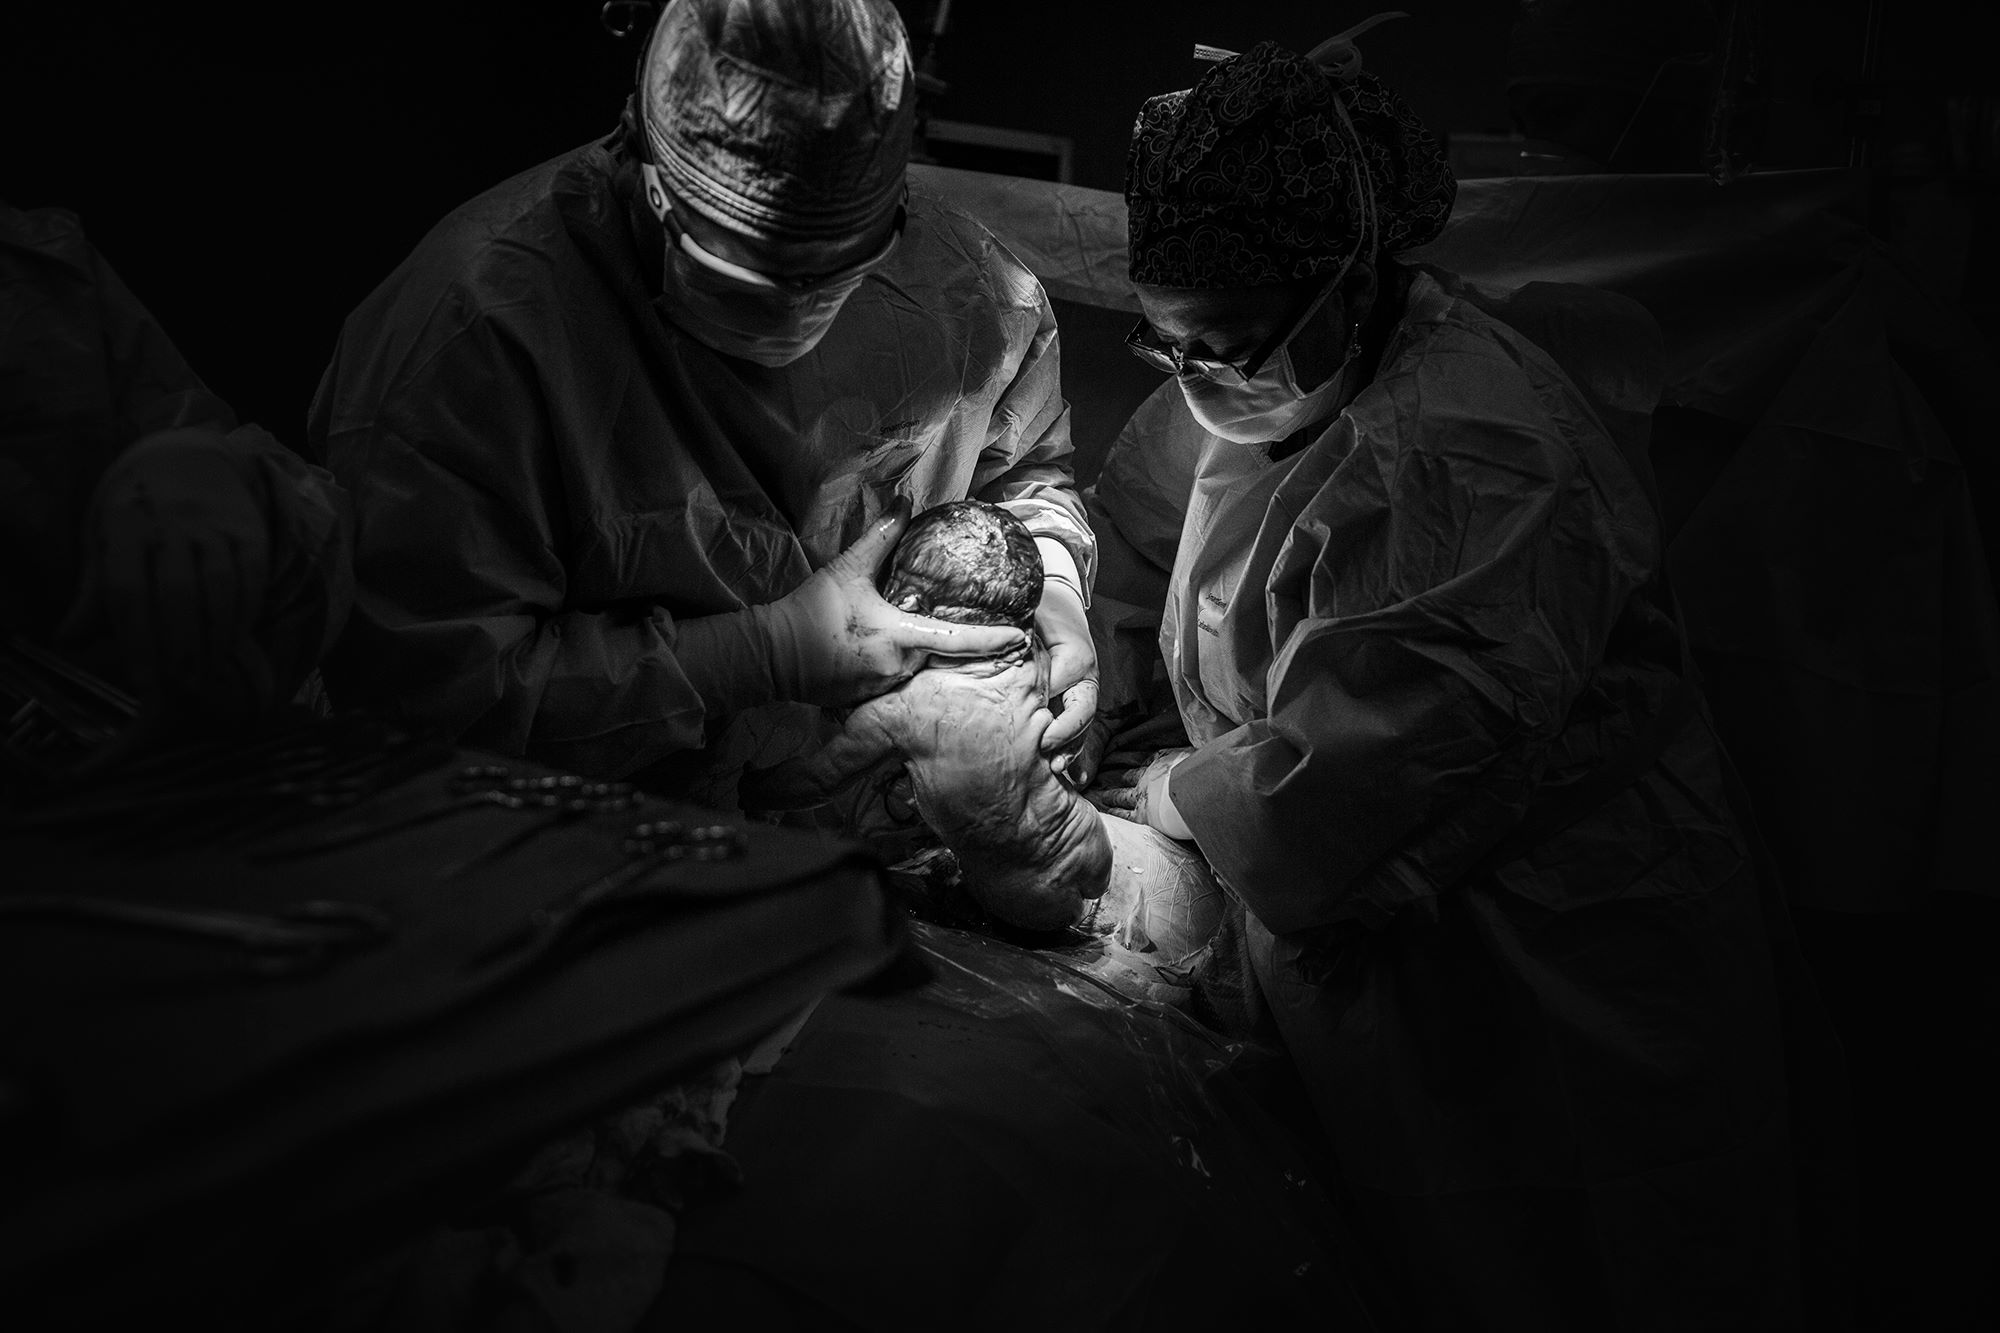
4. “How do I get into a cesarean birth? The hospital’s policy says only 1 person in the ER”.
Ask. Ask ask ask. You need to tell your client that should the need arise, or if there’s a chance a cesarean could be scheduled and she would like you there, she needs to give her OB a heads up well in advance. I have never NOT been allowed in the operating room, but I think that’s because of where we live…here in Portland, we are really blessed with medical staff that is open and understanding, and extremely patient-driven care… What works here might not work in Detroit or Calgary, I have no idea but it’s worth asking! It’s important to stress that the photographer is a professional, is being paid for this, and knows the rules. Then, KNOW THE RULES. Ask the staff before the scalpel comes out where it’s best for you to stand, how much freedom you have to move, if you can get closer to the baby once it arrives, etc. These are all important things to know beforehand because once things start happening, they happen so fast if you’re not prepared, you’ll miss it.
5. “I shot a birth once and the lighting was SO hard! How do you do it?”
- 1. Spot metering.
I spot meter all the time, anyway, FYI. But its especially important for births. Or births as I “see” them.
The difference between the top of the baby’s head where the surgical/delivery light hits, and the babe’s face 3 inches lower is ENORMOUS. For that critical “first breath shot” prepare your settings accordingly. I always meter off the the doctors hands while in the light to get an exposure guesstimate of what settings need to be for when baby makes its entrance. When the doctor pulls baby out, its going to bright. Better to meter of the bright parts and lighten some surrounding area if need be than to completely blow the whole photo to what will inevitably be totally unrecoverable.
Then, as soon as baby is out, adjust again or you’re going to have a lot of super dark unrecoverable images of mom looking at baby for the first time. And you don’t want that either, so THINKFAST!![]() Births are much more intense to shoot than weddings in terms of thinking on your feet camera-settings-wise. If you’re not ready for it, don’t take it on.
Births are much more intense to shoot than weddings in terms of thinking on your feet camera-settings-wise. If you’re not ready for it, don’t take it on.
- 2. Shoot RAW.
Again, I do this all the time anyway.
A correctly exposed image, regardless of the screwy and totally lame hospital lighting will never be anything that can’t be fixed in 10 seconds in ACR (adobe camera RAW). Here’s a before and after ACR adjustments. Iris looked pretty yellow in this lovely lighting so I cooled her off with the temperature slider, upped exposure, lowered the magenta just a tad, added a little bit of fill light. Adding a tiny pinch of the opposing color (cyan if yellow, etc) on the split toning menu can also be nice. Just really low saturation… I did that here. But overall, it really doesn’t take much! There’s no big secret besides the temperature slider. Babies at birth are odd colored, that’s just how it goes. I never remove color tones or anything like you would for a newborn session. This is documentary style shooting to me, and meant to feel as it was lived so don’t worry about a pink/bluey/dark baby. These aren’t glamour shots![]()
The hard thing for people is how quickly that temperature changes. I am always in AWB (auto white balance) or kelvin based off of the situation, and just deal with it afterwards. One photo might be blue from florescent lights, another yellow from daylight, etc. You just have to eyeball it. What did it look like *while* you were shooting? Use that as your goal.
SOOC:

Adjusted:
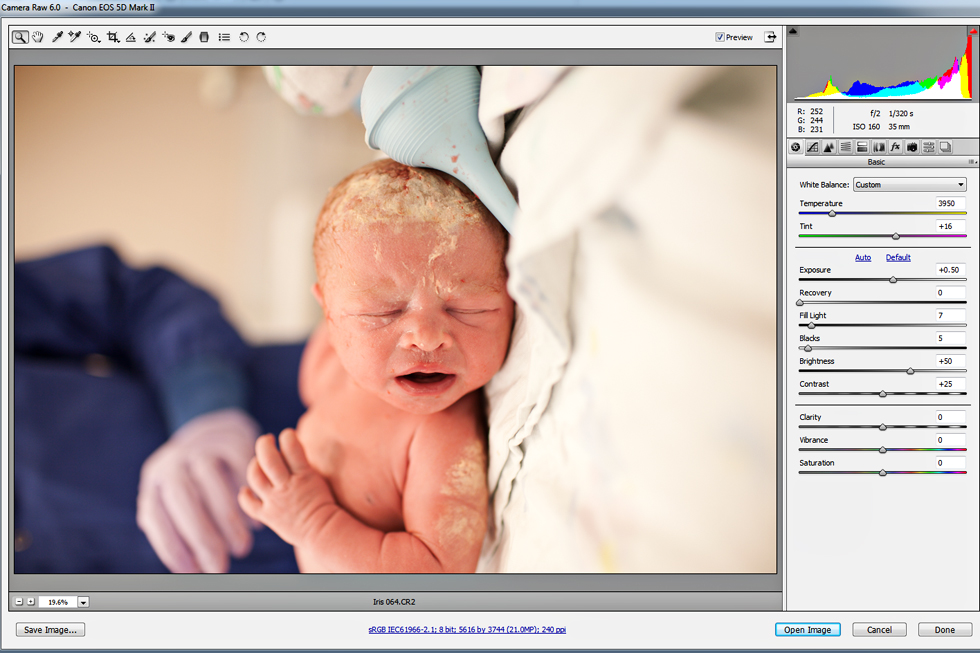
- Another hugely helpful and time saving tool for birth edits is the ACR adjustment brush- the little paintbrush fifth from the right at the top of the ACR menu (upper left of window). You can use it to adjust white balance or tint separately on different areas of the same photo. Why on earth would you want to do that? Well, if you’ve ever had the joy of shooting under florescent lights, a heat lamp, or with the color cast of a bright blue surgical curtain, you’ll understand 🙂 The image below is a 4 step process of correcting an extremely wonky, mixed white balanced image using the adjustment brush.

- 3. Prime Lenses: Notice how all those lenses up there have 1’s in the f/stop? If I had to shoot births with a zoom, I wouldn’t shoot births. I find the lack of depth of field to ruin it for me. And I never shoot narrower than f/2-something. Please, spare me the emails telling me how awesome it is to shoot births with your zooms. I’m glad for anyone that finds something that works for them. I just find that personally I do not enjoy the feel/end result of zooms, particularly with births. Those sweet, sweet details just aren’t the center of attention when you can see every piece of equipment and face in the background. See those little fingers in the last image of this post? Shot at 2.8 or 3.5, they would be lost in that photo.
Hospital Etiquette
I can. not. stress. the importance of this.
THINK AHEAD
I get lots of questions something along the lines of this: ” I shot a birth but there was no room for me to get a good shot during delivery” “the nurse moved me over to blah blah blah area” “I had a terrible angle”
Guess what? I don’t feel bad for you. If you’re sitting in a room with a laboring woman for even a HALF hour before delivery, you have plenty of time to think about how things are going to play out. The general setup tends to be L & D nurse(s) on the side of the bed with monitoring equipment and dad or support person(s) on the other side. That sounds like there’s no room for you, right? WRONG.
I have been known to walk casually over behind a hospital bed in the hour before actual delivery and nudge it forward. Just scootch scootch. Be casual about this. Don’t bump crap, and don’t move it very much. Watch the IV’s if there are any, and don’t unplug anything. I move it just enough to where I can fit myself directly behind mom…This is I think the best seat in the house and still gives dad his standard “at the shoulder” position, and is not in the way of the nurses or Dr. This is NOT the thing to be doing as delivery is happening. Please. 😀
Bonus if you can find something to stand on. You’ll need it, hospital beds are high. But that stepstool that’s always in the delivery room? ASK before you move or otherwise use it. Some nurses use them for delivery, some don’t. If its not in use it’s a great vantage point to have. Otherwise, I’ve used phone books, chairs, suitcases, ottomans, etc. Be creative here folks, this isn’t a jail cell!
Be nice.
No one likes a quiet, brooding, unsure photographer… Labor and delivery nurses are in my experience, pretty awesome people. Talk to them, don’t be silent or act like a weirdo. If you have some rapport with them, asking “can you move the bassinet over here for a minute?” or ” Do you mind if I stand right here?” becomes a part of conversation instead of an imposition on your part.
Be confident.
Follow the rules and know that as long as you do so, no one is going to get upset with you. Be comfortable with your client and comfortable with your shooting and all will go off without a hitch.![]() Having faith in yourself inspires others to have faith in you as well and really, that’s all anyone needs to let you do your thing. ^_^
Having faith in yourself inspires others to have faith in you as well and really, that’s all anyone needs to let you do your thing. ^_^
Home Birth Etiquette:
I’ve only shot a handful of home births, but there are some big differences- outside of the location- that are worth noting. Most of these will apply to birth center deliveries as well. I asked the wonderful Kimbery Bepler at ABC doulas if she had any advice for photographers shooting home births (since I haven’t done tons) so her thoughts are in here too. 🙂
Pay attention.
Anyone who has attended more than a few hospital births starts to get pretty good at observing the usual “steps” of delivery and anticipating what is going to happen next. With frequent cervical checks and constant monitoring (in some cases), predicting events usually isn’t a big deal. However, when a more ‘hands off’ approach is taken, you may not know whether your laboring client is at 3cm or 8cm, so you’ll need to adopt some zen and be ok with not knowing what will happen next. Watch (or ask, discreetly) the attending professionals what is going on if you’re not well versed in the subtleties of birth.
Get some coffee.
Natural birthing types are pretty unlikely to “speed things up” just for the sake of speeding things up. So, even more so than a hospital delivery, be prepared to stick around for…a while. Think 12-16 hours of active labor for many first time mamas.
Check yourself.
This was probably my favorite tip I was given – home births often have a very energy sensitive atmosphere. If you are fearful or anxious of photographing this kind of birth, don’t do it. If you’re having a bad day or are in a dark mood- leave it at the door. It’s important to only bring the best of yourself for a mama who needs all the support she can get.
Be on the same page.
Just like any other birth, talk to the midwife/doula/support people and clarify, if there is any question, where you should stand, etc. Be observant. During the delivery above, I was going from one end of the birth tub to the other because the midwives had let it be known that if mama delivered on all fours, they would pass the baby up through her legs, not deliver from behind and then move her. So, I immediately went to where I knew I’d get the best shot of baby arriving based on her position. (thanks to them!)
Happy baby time <3
I hope this helps, guys![]() I’m sure there’s tons I haven’t covered but maybe I’ll add to this later. Happy shooting!
I’m sure there’s tons I haven’t covered but maybe I’ll add to this later. Happy shooting!
xoxo
Leave a Reply